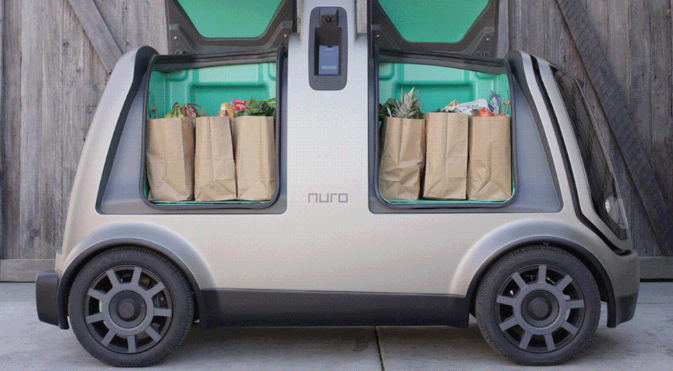
Imagine a world where your child doesn't just play with toys but builds, programs, and brings them to life. A Driving Robot Kit is the gateway to this reality, merging hands-on engineering with the thrill of creating a smart, mobile machine. This isn't just another gadget; it's a foundational tool that introduces core AI and robotics concepts in a tangible, engaging way. For young innovators and curious minds, assembling and coding a robot that navigates its environment is the first step toward understanding autonomous technology. This guide will explore why these kits are revolutionizing STEM education, what makes them tick, and how you can master the build process to foster a lifelong passion for innovation.
What Exactly Is a Driving Robot Kit?
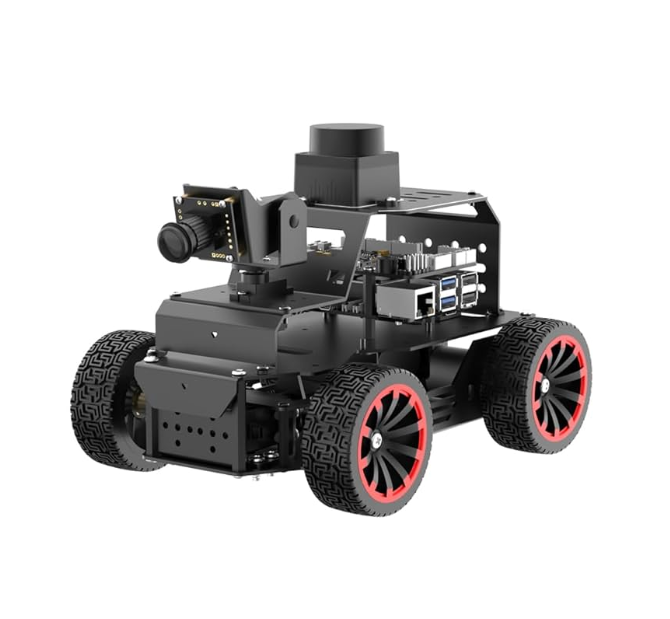
A Driving Robot Kit is a comprehensive package containing all the necessary components to build a wheeled robot capable of autonomous or remote-controlled movement. These kits typically include microcontrollers (like Arduino or Raspberry Pi), motors, wheels, sensors, chassis, and wiring, along with instructional materials. They are designed for educational purposes, allowing users to learn mechanical assembly, electronics, and programming through practical application. Unlike pre-assembled robots, these kits require active participation, making them ideal for developing problem-solving skills and understanding the principles of robotics and AI. They range from beginner-friendly sets with drag-and-drop coding to advanced kits involving Python or C++ programming.
Key Components of a High-Quality Driving Robot Kit
When selecting a kit, it's essential to understand the core components that determine its functionality and educational value. A robust kit should include a reliable microcontroller, such as an Arduino Uno or Raspberry Pi, which acts as the robot's brain. Motors and motor drivers are critical for movement, providing the torque and control needed for precise navigation. Sensors—like ultrasonic distance sensors, infrared line followers, or gyroscopes—enable the robot to interact with its environment, laying the groundwork for AI behaviors. The chassis and mechanical parts should be durable yet easy to assemble, often made from materials like acrylic or aluminum. Finally, detailed documentation and software support are vital for a smooth learning experience, especially for those new to robotics.
Step-by-Step Guide to Building Your First Driving Robot Kit
Step 1: Unboxing and Inventory Check
Begin by carefully unboxing your kit and verifying all components against the included checklist. This prevents mid-build surprises and ensures you have everything needed—microcontroller, motors, sensors, screws, and tools. Familiarize yourself with each part; many kits provide labeled diagrams to aid identification.
Step 2: Assembling the Chassis and Mechanical Structure
Follow the instructions to assemble the chassis, attaching motors, wheels, and any structural brackets. Use the provided tools to secure components firmly but avoid over-tightening screws, which could damage plastic parts. This stage teaches basic mechanical engineering, emphasizing stability and balance for optimal movement.
Step 3: Wiring Electronics and Sensors
Connect the motors to the motor driver board and link everything to the microcontroller. Attach sensors according to the schematic, ensuring correct pin connections. This step introduces electronics fundamentals, such as circuit design and power management. Double-check wiring before powering on to prevent short circuits.
Step 4: Programming and Testing
Upload initial code (often provided with the kit) to test basic movements. Use beginner-friendly platforms like Scratch or Blockly for simple tasks, or advance to Python/C++ for complex behaviors like obstacle avoidance. Experiment with sensor data to make the robot responsive—e.g., programming it to stop when detecting an object. Iterative testing and debugging are key here, reinforcing computational thinking.
Why a Driving Robot Kit is a Game-Changer for STEM Education
Driving Robot Kit offerings transform abstract STEM concepts into hands-on experiences. They bridge theory and practice, allowing learners to see direct results of their coding and engineering decisions. For instance, calibrating a sensor to avoid obstacles teaches real-world AI applications like spatial awareness and decision-making. Moreover, these kits foster creativity; users can modify designs or add functionalities, such as Bluetooth control or computer vision. This adaptability makes them invaluable for developing critical thinking and innovation skills, preparing the next generation for tech-driven careers. As highlighted in our article Why A Driving Robot Toy Is The Ultimate Gift For Young Innovators, these kits inspire curiosity and resilience through trial and error.
Advanced Applications: Beyond Basic Movement
Once you've mastered the basics, a Driving Robot Kit can evolve into a platform for advanced AI projects. Integrate machine learning libraries to enable object recognition using camera modules, or implement pathfinding algorithms for autonomous navigation in complex environments. Some enthusiasts connect their robots to IoT platforms for remote monitoring and control, showcasing the intersection of robotics and smart technology. These projects not only deepen technical skills but also demonstrate the practical potential of AI in everyday life, from home automation to exploratory robots.
FAQs About Driving Robot Kit
What age group is most suitable for a Driving Robot Kit?
Most kits are designed for ages 10 and up, with complexity varying by skill level. Beginner kits with visual programming are ideal for ages 10-14, while advanced kits requiring text-based coding suit teens and adults. Always check the manufacturer's age recommendations to ensure appropriateness.
Do I need prior programming experience to use a Driving Robot Kit?
No! Many kits are beginner-friendly, offering step-by-step tutorials and visual programming interfaces. However, familiarity with basic coding concepts can accelerate learning. As you progress, you'll naturally develop programming skills through experimentation.
Can I customize my Driving Robot Kit after completing the initial build?
Absolutely. Customization is encouraged—add new sensors, 3D-print parts, or integrate with other platforms like ROS (Robot Operating System). This flexibility allows endless innovation, making the kit a long-term learning tool rather than a one-time project.
Conclusion
A Driving Robot Kit is more than a toy; it's an investment in future-ready skills. By blending physical construction with digital programming, it offers a holistic understanding of robotics and AI. Whether you're a parent seeking an educational gift or a hobbyist exploring new technologies, these kits provide a rewarding journey from assembly to autonomy. Start with a beginner-friendly model, embrace the learning curve, and watch as simple components transform into a intelligent machine capable of navigating the world—one line of code at a time.