Vertical video content is dominating social media platforms like TikTok, Instagram Reels, and YouTube Shorts. As a result, editors are increasingly looking for ways to crop their footage to 9:16 in DaVinci Resolve, the industry-standard video editing software. While DaVinci Resolve is primarily known for cinematic and widescreen projects, it offers powerful tools to create vertical video content without compromising quality.
In this guide, we’ll cover the step-by-step process for cropping to 9:16, discuss important considerations for framing and composition, and provide practical tips to maintain resolution, color integrity, and overall visual appeal. Whether you’re creating content for social media, marketing campaigns, or personal projects, mastering this workflow will help you produce professional vertical videos efficiently.

Why 9:16 Vertical Video Matters
The 9:16 aspect ratio corresponds to vertical video formats widely used on mobile devices. Creating content in this format ensures:
Full-screen mobile experience: Viewers engage more with content that fills the screen.
Platform optimization: Social media algorithms prioritize vertical video for mobile-first audiences.
Creative flexibility: Cropping allows editors to focus on key subjects, enhance storytelling, and remove unnecessary background elements.
By understanding how to crop to 9:16 in DaVinci Resolve, editors can adapt widescreen footage for vertical display while maintaining control over composition and quality.
Step-by-Step Guide to Crop to 9:16 in DaVinci Resolve
1. Create a New Timeline with Vertical Resolution
Open DaVinci Resolve and go to File > New Project, then name your project.
Navigate to Timeline > Timeline Settings or click the gear icon in the lower-right corner.
Set the Timeline Resolution to vertical dimensions, such as 1080x1920 or 1440x2560.
Choose Square Pixels (1.0) to ensure correct aspect ratio mapping.
Set the Timeline Frame Rate according to your footage (e.g., 30 fps or 60 fps).
This ensures that the project is correctly formatted for vertical video from the start, preventing black bars or scaling issues later.
2. Import and Place Footage
Drag your footage into the Media Pool and place it on the timeline.
If your original footage is widescreen (16:9), it will not automatically fit the vertical frame, so cropping or scaling adjustments are necessary.
3. Adjust Clip Transform Settings
Select the clip in the timeline.
Open the Inspector Panel on the top-right corner.
Locate the Transform section.
Use the Zoom, Position X, and Position Y controls to crop your footage while keeping the subject centered.
Tips for precision:
Zoom slightly: Avoid losing quality while ensuring the subject fits the vertical frame.
Adjust position: Center important subjects and avoid cutting off heads, hands, or critical action.
4. Apply Cropping Directly (Optional)
In the Inspector, find the Cropping section.
Adjust Crop Left, Crop Right, Crop Top, and Crop Bottom to achieve precise framing.
Combine with Zoom adjustments if needed to fill the vertical frame completely.
This method provides more granular control compared to Transform alone, allowing for fine-tuning of composition without excessive scaling.
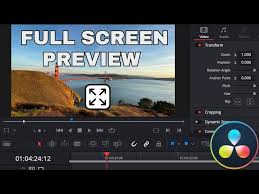
5. Check Safe Areas and Composition
Enable Safe Area Guides in the timeline viewer to ensure that important elements are not cut off.
For social media vertical video, keep the main subject within the central 70–80% of the frame.
6. Export Settings for 9:16 Vertical Video
Go to the Deliver Page in DaVinci Resolve.
Set the Resolution to match your vertical timeline (1080x1920, 1440x2560, etc.).
Choose your Codec (H.264 or H.265 for social media).
Set Quality to high or best to retain clarity.
Ensure Frame Rate matches the timeline.
Render the video and preview it on a mobile device for verification.
Advanced Tips for Vertical Cropping in DaVinci Resolve
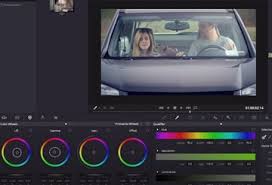
Use Adjustment Clips: Apply color grading or effects to the entire vertical sequence without modifying individual clips.
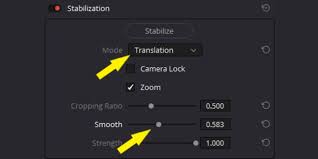
Motion Tracking: For moving subjects, consider using DaVinci Resolve’s tracker to keep the subject centered in vertical framing.
Keyframing: Animate crop and zoom adjustments over time for dynamic scenes.
Templates and Presets: Save your 9:16 project settings as a preset for future vertical videos, speeding up workflow.
Practical Use Cases
TikTok and Instagram Reels
Editors can crop 16:9 footage to 9:16 for vertical social media content without reshooting, saving time and production costs.Corporate Video Marketing
Businesses producing promotional content can quickly adapt existing widescreen footage into vertical formats for mobile campaigns.Personal Vlogging
Content creators can optimize family, travel, or lifestyle footage for mobile-first platforms, ensuring full engagement and immersive viewing.
Frequently Asked Questions
Q1: Can I crop to 9:16 without losing image quality?
A1: Minor zooming and cropping may reduce resolution slightly. To minimize quality loss, start with high-resolution footage and adjust carefully in Transform or Cropping.
Q2: Will this method work for both 16:9 and 4K footage?
A2: Yes. Ensure your timeline resolution matches the vertical target, and scale or crop footage accordingly. 4K footage gives more room for cropping without noticeable quality loss.
Q3: Can I automate cropping for multiple clips?
A3: Yes. Apply Transform or Cropping adjustments to an adjustment clip over multiple clips, or copy and paste attributes across clips.
Q4: Should I use zoom or cropping for vertical framing?
A4: Use a combination: zoom slightly to fill the frame, then crop for precise framing. Avoid excessive zooming to prevent quality degradation.
Conclusion
Knowing how to crop to 9:16 in DaVinci Resolve is essential for editors producing content for modern social media platforms. By creating a vertical timeline, carefully adjusting Transform and Cropping settings, and applying advanced techniques like motion tracking and keyframing, you can produce high-quality vertical videos that maintain composition, clarity, and engagement.
Whether you’re a social media creator, corporate editor, or independent filmmaker, mastering vertical cropping in DaVinci Resolve ensures your content is optimized for mobile viewing, maximizing audience retention and visual impact. With these techniques, vertical video production becomes precise, efficient, and professional.