Recording your voice is often the first step in transforming a simple melody into a polished track. Whether you are a singer, rapper, or podcaster, knowing how to add your voice on BandLab gives you the power to create, edit, and share your sound with the world—all for free. BandLab has quickly become one of the most popular online digital audio workstations (DAWs), with over 60 million users worldwide. But for many newcomers, the question remains: how exactly do you record and layer your voice onto a project?
This guide will walk you through everything you need to know, from setup to recording techniques and publishing tips.

Why Record Your Voice on BandLab?
Before diving into the technical steps, it’s important to understand why BandLab is such a go-to choice for vocal recording.
Accessibility: BandLab works on both desktop browsers and mobile apps (iOS and Android), meaning you don’t need expensive studio equipment to start recording.
Free Features: Unlike some DAWs, BandLab gives you unlimited tracks, effects, and mastering options at no cost.
Collaboration: Once you record your voice, you can share it instantly with collaborators anywhere in the world.
Cloud Storage: Your recordings are saved in the cloud, so you can pick up where you left off on any device.
For anyone asking how to add your voice on BandLab, these features make it one of the most beginner-friendly DAWs available today.
Preparing to Add Your Voice
To get the best results, spend a few minutes setting up properly before you hit record.
Choosing the Right Microphone
You can start with your device’s built-in mic, but for clearer quality:
USB microphones like the Blue Yeti or Audio-Technica ATR2100x are affordable and easy to set up.
XLR microphones offer professional quality but require an audio interface.
Headset or AirPods can work for casual recordings but may pick up background noise.
Setting Up Your Environment
Record in a quiet room with minimal background noise.
Use soft furnishings (curtains, carpets) to reduce echo.
Position the mic about 6–12 inches from your mouth to balance clarity and avoid distortion.
Checking Internet and Device Performance
Since BandLab is cloud-based, a stable internet connection ensures smooth recording and syncing. Close unnecessary apps to avoid lag, especially when using the mobile app.
Step-by-Step: How to Add Your Voice on BandLab
Here’s the core process broken down for both mobile and desktop users.
Adding Your Voice on BandLab Mobile App
Open the BandLab App and tap the “+” icon to create a new project.
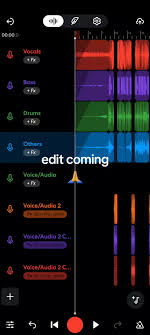
Choose the Voice/Audio option. This opens the track view with the microphone ready to record.
Enable Monitoring if you want to hear yourself in real time (earphones are recommended to avoid feedback).
Adjust Input Settings: Tap the gear icon to adjust gain levels, choose effects, or select your input source (built-in mic, headset mic, etc.).
Press Record and perform. When you’re done, tap stop.
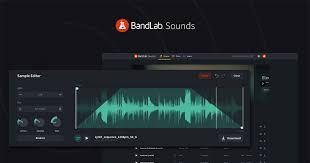
Edit the Track: Use BandLab’s built-in editor to trim, adjust volume, and apply effects. Popular options include reverb, EQ, and auto-pitch.
Save and Sync: Your recording is automatically stored in the cloud, ready for editing or sharing.
Adding Your Voice on BandLab Desktop (Browser or Desktop App)
Go to BandLab.com and log in.
Click “Create” and select a new project.
Add a Voice Track by choosing the microphone input.
Check Input Settings under the track’s menu—ensure your preferred mic is selected.
Turn on Monitoring if you want live feedback.
Record Your Vocals and stop when finished.
Mix and Edit using BandLab’s Mix Editor. You can layer multiple takes, adjust timing, and add mastering effects.
Tips for Better Vocal Recordings
Adding your voice on BandLab is easy, but getting professional-quality results requires some fine-tuning.
Warm Up Before Recording: A few minutes of vocal exercises improve tone and prevent strain.
Use Pop Filters: These reduce plosive sounds like “p” and “b.”
Experiment with Effects: BandLab offers presets such as “Studio Vocal” and “Classic Reverb” that can instantly enhance your track.
Record Multiple Takes: Layering or comping vocals from different takes creates a fuller sound.
Master Your Track: BandLab has a free mastering feature that balances your final mix automatically.
Publishing Your Voice Recordings
Once you’re happy with how your voice sounds, BandLab makes it easy to share your work.
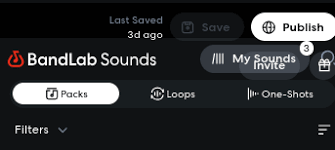
Tap Publish after saving your project.
Add a title, description, and tags so others can discover your track.
Choose to share publicly or privately.
BandLab also lets you export your track as an MP3 or WAV file, perfect for uploading to Spotify, SoundCloud, or YouTube.
FAQs: How to Add Your Voice on BandLab
Q: Can I record my voice on BandLab without a microphone?
A: Yes. You can use your phone or laptop’s built-in mic, but external microphones produce better quality.
Q: Why can’t I hear myself while recording?
A: Make sure monitoring is enabled and you’re using headphones to avoid feedback.
Q: Can I add harmonies or layers?
A: Absolutely. BandLab allows unlimited tracks, so you can record multiple vocal layers.
Q: Do I need an audio interface?
A: Not for casual use. However, if you’re using professional XLR mics, an interface like Focusrite Scarlett is recommended.
Q: Is adding vocals free on BandLab?
A: Yes. All vocal recording and editing features are included in the free version of BandLab.
Conclusion
Learning how to add your voice on BandLab is one of the fastest ways to start making music, whether you’re a complete beginner or an experienced artist. With nothing more than your phone or computer, you can record, edit, and publish professional-sounding vocals. By setting up your mic correctly, experimenting with effects, and leveraging BandLab’s free mastering tools, you’ll be able to create tracks that are ready for streaming platforms or collaborations.
BandLab proves that you don’t need an expensive studio setup to share your voice with the world—all you need is a little creativity and the right recording process.