One of the most important features in digital music production is the ability to hear yourself while recording. This is known as monitoring, and it helps musicians stay on pitch, keep in rhythm, and adjust their performance in real time. If you are using BandLab, you might be wondering: how to turn on monitoring on BandLab?
The good news is that BandLab makes it simple to activate monitoring, whether you are recording vocals, guitar, or any other instrument. In this article, we’ll cover exactly how to set it up, explain why it matters, and give you insider tips to avoid common pitfalls like latency and feedback.

What Is Monitoring in BandLab?
Monitoring in BandLab means enabling real-time playback of your input audio through your headphones or speakers. For example:
When recording vocals, you hear your own voice as you sing.
When playing guitar, you hear your amplified tone through BandLab’s virtual effects.
Without monitoring, recording feels like singing into a void—you only hear the backing track, not your live input. This makes it harder to stay in sync and adjust your performance.
Why Monitoring Matters in BandLab
According to BandLab’s user data, over 60 million creators worldwide rely on the platform for recording and mixing. For most beginners, the ability to hear themselves while tracking is the difference between a messy recording and a usable take.
Monitoring helps you:
Stay on pitch while singing.
Keep rhythm with backing tracks.
Adjust tone, mic placement, or effects on the spot.
Reduce the need for constant re-recording.
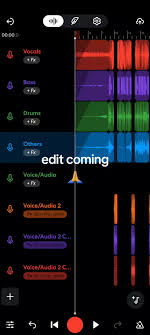
How to Turn On Monitoring on BandLab (Mobile App)
If you are using the BandLab mobile app (iOS or Android), here’s how to enable monitoring:
Open BandLab and Create a Project
Tap the “+” icon and start a new project.
Add a voice/mic track or instrument track.
Enable Monitoring in the Track Settings
Once the track is created, look for the mic icon or input options.
Toggle the monitoring switch (usually represented by a headphone symbol).
Use Headphones for Best Results
BandLab warns users that monitoring with speakers can create feedback loops.
Wired headphones reduce latency compared to Bluetooth options like AirPods.
How to Turn On Monitoring on BandLab (Desktop/Browser)
If you are recording on BandLab through Chrome or another browser, the steps are slightly different:
Log in to BandLab on Your Desktop
Open a project and add a new track.
Select the Input Source
Choose your microphone or audio interface from the input dropdown.
Enable Monitoring
In the track panel, toggle on monitoring so you can hear your live input.
Adjust Latency Compensation
BandLab includes a latency calibration tool. Run this test to sync your audio.
Common Problems When Turning On Monitoring in BandLab
Even if you know how to turn on monitoring on BandLab, you may run into issues. Here are the most frequent ones:
Latency
Bluetooth devices like AirPods can create delays.
Fix: Use wired headphones or an audio interface.
Feedback Noise
Happens when using speakers instead of headphones.
Fix: Always use headphones for monitoring.
Low Volume Monitoring
Some devices lower monitoring volume to protect hearing.
Fix: Adjust BandLab’s monitoring level in the track settings.
Monitoring Not Working
May be caused by browser permissions or app settings.
Fix: Ensure microphone access is enabled in device settings.
Pro Tips for Monitoring in BandLab
Use an Audio Interface: Devices like Focusrite Scarlett Solo or iRig improve monitoring quality and reduce latency.
Experiment with Effects While Monitoring: BandLab lets you apply reverb, compression, and guitar amps in real time.
Keep Gain Levels in Check: Avoid distortion by setting input gain before enabling monitoring.
Leverage BandLab’s Mastering Tools: After recording, use BandLab’s free mastering presets to enhance your monitored takes.
Who Benefits Most from Monitoring on BandLab?
Vocalists who need pitch accuracy while tracking.
Guitarists and bassists who rely on amp simulation.
Producers layering multiple instruments.
Beginners who want immediate feedback to improve their technique.
Monitoring is not just a feature—it’s an essential tool for growing as a musician.
FAQs About Monitoring in BandLab
1. Do I need headphones to use monitoring in BandLab?
Yes. Using speakers causes feedback, so headphones are strongly recommended.
2. Does monitoring cause latency in BandLab?
Sometimes. Latency is more noticeable with wireless devices. Wired headphones and audio interfaces reduce the problem.
3. Can I add effects while monitoring in BandLab?
Yes. BandLab allows you to monitor your input with effects applied in real time.
4. Is monitoring available on both mobile and desktop BandLab?
Yes, though the interface is slightly different between the app and browser.
5. Why can’t I hear myself when monitoring is on?
This usually happens if the microphone is not selected as the input source. Double-check your device settings.
Conclusion: Mastering Monitoring on BandLab
So, how to turn on monitoring on BandLab? Whether you’re using the mobile app or the desktop browser, the process is simple: select your input, toggle on monitoring, and use headphones for the best results.
Monitoring transforms your BandLab experience. It helps you stay in rhythm, improves pitch accuracy, and gives you confidence in your recordings. While there are limitations—like latency with wireless headphones—using the right setup can make BandLab feel as powerful as a professional DAW.
If you’re serious about music production, learning how to turn on monitoring on BandLab is one of the first steps toward clean, professional recordings.