Collaboration has always been the heartbeat of music. Whether it’s a band writing songs together or producers swapping stems, working with others often sparks creativity in ways that solo work doesn’t. With the rise of cloud-based platforms, this process has become much more seamless. One of the most popular tools today for online music collaboration is BandLab. If you’re wondering how to collaborate on BandLab, this guide will walk you through every detail—from setup to advanced workflow tips.

Why BandLab Is Built for Collaboration
BandLab isn’t just another digital audio workstation (DAW). While it has all the tools you’d expect—recording, mixing, mastering, and virtual instruments—it sets itself apart with cloud-based collaboration features.
Cross-device access: You can start a project on your PC, continue editing on your phone, and share it instantly with others.
Real-time project sharing: Invite collaborators directly into your project, so everyone sees updates in one place.
No expensive gear needed: BandLab is free and works on the web, iOS, and Android, making it accessible to anyone with an internet connection.
According to BandLab’s official numbers, the platform now has over 60 million users worldwide, making it one of the largest online music communities. That means more opportunities for collaboration than ever before.
Step-by-Step: How to Collaborate on BandLab
Let’s break down exactly how you can collaborate with other musicians, producers, or songwriters on BandLab.
1. Create and Set Up Your Project
Log into your BandLab account (free to sign up).
Click “Create” and start a new project.
Record your idea, upload stems, or add MIDI instruments.
This becomes your collaboration hub.
2. Invite Collaborators
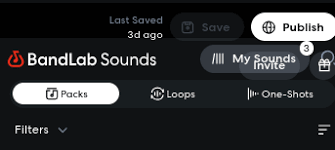
Inside your project, look for the “Invite Collaborators” option.
You can invite by username, email, or by generating a collaboration link.
Choose whether your project is public, private, or only visible to invited members.
Pro tip: If you’re working with a producer remotely, you can send them a direct invite using their BandLab handle.
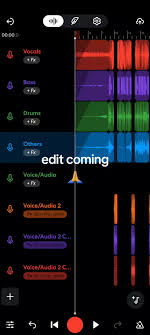
3. Share Tracks and Layers
BandLab uses a non-destructive editing system, meaning your collaborators can add new tracks without overwriting yours. This makes it perfect for:
Adding vocals to an instrumental.
Sending guitar riffs for layering.
Sharing stems for remixing.
4. Use Revision History
One underrated feature is revision history. Every time you or your collaborator saves changes, BandLab logs it. This allows you to:
Compare different versions.
Roll back if a mix doesn’t work.
Track each collaborator’s contributions.
5. Chat and Comment Inside the Project
Instead of juggling external chats, you can use BandLab’s built-in text and comment tools.
Drop timestamped comments on specific parts of the track.
Use chat to share references or feedback.
This feature keeps everything organized and avoids confusion.
Tips to Make Collaboration on BandLab Smoother
Set roles early: Decide who’s mixing, who’s arranging, and who’s just dropping stems.
Organize track names: Rename tracks (e.g., “Lead Vocals V1 – Alex”) so everyone knows what’s what.
Agree on file formats: Use BandLab’s export for stems, but if you’re uploading external files, stick to WAV for highest quality.
Leverage BandLab’s mastering tool: Once the project is near completion, run it through BandLab’s free mastering engine to hear a polished version before final tweaks.
Real-World Example: Collaboration Across Continents
Here’s a real scenario: A guitarist in London uploads a chord progression on BandLab. A rapper in New York lays vocals on top of it. A producer in Tokyo adds drums and synth textures. Within hours, the track evolves from a simple riff into a multi-layered international collaboration—all without exchanging messy email attachments.
This is exactly why BandLab has become popular among indie artists, students, and even professionals who want fast turnaround times.
Alternatives to BandLab Collaboration
While BandLab is free and accessible, it’s not the only option. Here are some alternatives:
Soundtrap by Spotify: Similar real-time collaboration, but requires a paid plan for advanced features.
Splice Studio: Great for sharing stems, but not as strong in real-time editing.
Avid Cloud Collaboration (Pro Tools): Professional-level, but comes at a much higher cost.
Compared to these, BandLab remains the most beginner-friendly and cost-effective choice.
Common Issues When Collaborating on BandLab
Even with a great tool, hiccups can happen. Here are some issues and solutions:
Latency during live recording: Use headphones and lower buffer size in audio settings.
Confusion over versions: Always label your tracks and use revision history.
Audio quality concerns: Make sure collaborators export stems at 44.1 kHz WAV instead of MP3.
FAQs About How to Collaborate on BandLab
1. Is collaborating on BandLab free?
Yes, all core collaboration features are free. You only need an account.
2. Can I collaborate with someone who doesn’t use BandLab?
Yes. You can export your project as stems and share them via Dropbox or Google Drive, then re-import later.
3. How many people can collaborate on a BandLab project?
There’s no strict limit, but projects run best with under 10 collaborators for performance reasons.
4. Do I need the BandLab app to collaborate?
No. You can use the web version on PC or Mac, but the mobile app makes it more flexible.
5. Does BandLab support real-time jam sessions?
Not in the same way as live jamming, but you can record, upload, and update projects nearly instantly.
Conclusion: Why BandLab Is the Best Place to Collaborate Online
If you’ve ever struggled with sending large files back and forth, lost track of versions, or wasted hours organizing a project, BandLab is a game-changer. Knowing how to collaborate on BandLab gives you a huge creative advantage, whether you’re an indie artist building your first demo or a seasoned musician producing tracks across continents.
With its free tools, built-in mastering, and growing community, BandLab makes collaboration not only possible but genuinely enjoyable.