Introduction
For professional video editors and colorists, mastering video signal monitoring is crucial. In DaVinci Resolve, one of the most commonly used tools for this purpose is the IRE waveform, which allows precise control over luminance levels. Many editors also wonder about the difference between IRE vs percentage in DaVinci Resolve, especially when transitioning between broadcast standards or adjusting exposure.
In this guide, we’ll explore what IRE is, how to read and interpret the IRE waveform in DaVinci Resolve, compare IRE to percentage measurements, and provide practical tips for achieving accurate color and luminance grading. Whether you’re working on film, broadcast, or digital content, understanding these concepts ensures professional-quality output.
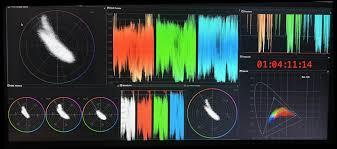
What Is IRE in Video Production?
IRE, or Institute of Radio Engineers unit, is a scale used to measure video signal levels. It ranges from 0 to 100, where 0 IRE represents black and 100 IRE represents full white. Unlike percentage-based scales, which are relative, IRE is tied to broadcast specifications, making it essential for professional workflows.
Key points about IRE:
0 IRE = Black: Complete absence of luminance
100 IRE = White: Maximum legal luminance in broadcast video
Reference for Broadcast: Ensures video meets standards without clipping highlights or crushing shadows
Understanding IRE Waveform in DaVinci Resolve
The Waveform Monitor in DaVinci Resolve is an essential tool for evaluating luminance levels. When set to display IRE:
Shadows: Represented between 0–20 IRE
Midtones: Typically around 40–70 IRE
Highlights: Occupying 80–100 IRE
By enabling the waveform in DaVinci Resolve’s Color Page > Scopes, you can observe your footage’s brightness distribution. This allows for precise adjustments with lift, gamma, and gain controls to achieve accurate exposure and dynamic range.
IRE vs Percentage in DaVinci Resolve
DaVinci Resolve allows users to switch between IRE and percentage readings:
IRE Scale: Standard for broadcast. Black at 0 IRE, white at 100 IRE. Ideal for professional delivery to television or regulatory compliance.
Percentage Scale: Relative brightness from 0% to 100%. Useful for general digital workflows and social media content where broadcast standards are less strict.
Example: A white highlight at 90 IRE corresponds to 90% in percentage mode, but in percentage mode, editors may interpret levels more intuitively without considering broadcast limits.
Choosing between IRE and percentage depends on your output target: use IRE for broadcast and film, and percentage for online and streaming content.
How to Use IRE Waveform in DaVinci Resolve
1. Enable Waveform Monitor
Navigate to Workspace > Scopes or click the Scopes icon in the Color Page.
Select Waveform as your display type.
Set the scale to IRE for broadcast accuracy.
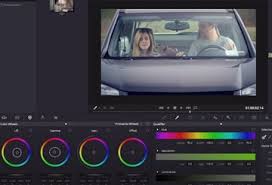
2. Adjust Lift, Gamma, Gain
Lift: Controls shadows. Keep black levels around 7–10 IRE to avoid crushing.
Gamma: Controls midtones. Adjust for natural skin tones and balanced exposure.
Gain: Controls highlights. Ensure whites don’t exceed 100 IRE unless intentional.
3. Monitoring Saturation
Although IRE primarily represents luminance, it indirectly affects color perception. Combine waveform monitoring with Vectorscope to maintain accurate color balance and avoid oversaturation.
4. Practical Tips
Always reference scopes over relying on histogram or visual judgment alone.
Use IRE for consistent output across multiple devices and platforms.
Calibrate your monitor for accurate waveform readings, especially in professional grading studios.
Common Scenarios: IRE vs Percentage
Broadcast Television
Editors must comply with legal luminance limits. Using IRE ensures that blacks aren’t below 0 and highlights don’t exceed 100 IRE, preventing clipping on broadcast TVs.Digital Streaming Platforms
For YouTube or TikTok, percentage readings suffice, but using IRE can still improve tonal consistency, especially when repurposing content for multiple platforms.Film Color Grading
In cinema workflows, IRE is a preferred standard for controlling exposure. For example, subtle highlight adjustments in a scene can be measured precisely using IRE waveform.
Practical Workflow Tips in DaVinci Resolve
Custom Scopes Layout: Arrange waveform, vectorscope, and histogram together for comprehensive monitoring.
Secondary Grading: Use IRE readings when applying LUTs or color corrections to avoid overexposed highlights.
Consistency Across Shots: Maintain similar IRE values across multiple shots in a sequence for seamless visual continuity.
Frequently Asked Questions
Q1: Can I switch between IRE and percentage easily?
A1: Yes. In the DaVinci Resolve Waveform monitor, click the scale options and select either IRE or percentage based on your workflow needs.
Q2: What is a safe IRE range for broadcast?
A2: Black levels: 0–7 IRE; White levels: 93–100 IRE. Staying within these limits prevents signal clipping.
Q3: Does IRE affect color grading?
A3: Yes. Proper luminance levels maintain accurate color perception. Combining waveform and vectorscope ensures both brightness and color integrity.
Q4: Should I use IRE for social media content?
A4: While not mandatory, using IRE can help maintain consistent exposure and improve visual quality, especially if repurposing content for multiple platforms.
Conclusion
Mastering the IRE waveform in DaVinci Resolve and understanding the difference between IRE vs percentage is crucial for any professional editor or colorist. Whether you are producing content for broadcast, digital streaming, or cinematic projects, using IRE ensures precise control over luminance, prevents clipping, and maintains color fidelity.
By integrating waveform monitoring into your workflow, carefully adjusting lift, gamma, and gain, and selecting the appropriate scale for your target platform, you can achieve professional, consistent, and visually compelling results. IRE is not just a technical metric—it’s a tool that elevates the quality and reliability of your video production.

